| Creating a Vue atmosphere sphere |
| The first step obviously is to create the atmosphere. For help on doing that you should read this. The basic workflow would be to do test renders from several views. For these you would use the standard camera, rotating it to get the views you want. Once you are happy, you can then export your sky with the following workflow. I. Spherical Camera Setup
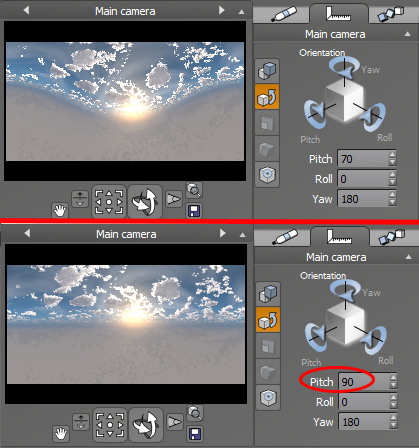
In addition to zeroing out the camera, we also want to do the same for the sun so that it will appear in the middle of the panoramic image. To do this we will set the yaw and roll to zero and only raise or lower the pitch depending on how high we want to have our sun in the sky. So in sum:
Camera:
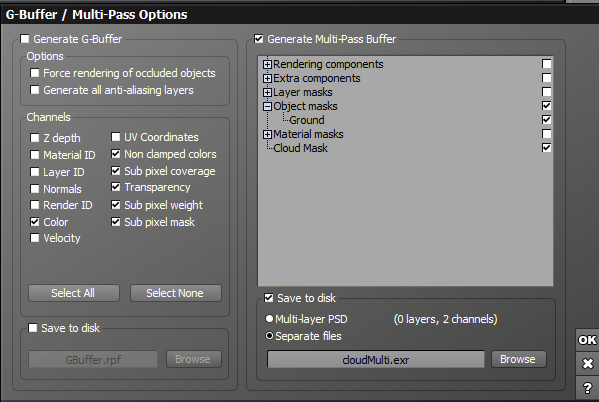
Sun: Next we open the render settings dialog and check "panoramic view" and "spherical render."
Here we want to choose "cloud mask" and chose a file name and render in EXR. For the EXR options you want 16 bit float with ZIP 1-scanline compression. This will render out a mask we can use to separate the cloud from the sky (see the Nuke section below). We can get a render of the sky itself by turning off the cloud(s) in the Atmosphere Editor and rendering that out with a different name. Note: You'll want to uncheck both of these above naming tickboxes when doing test renders so you don't accidentally overwrite your saved images!
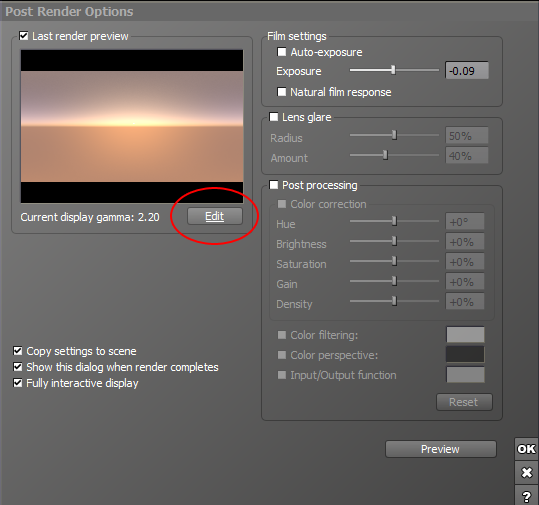
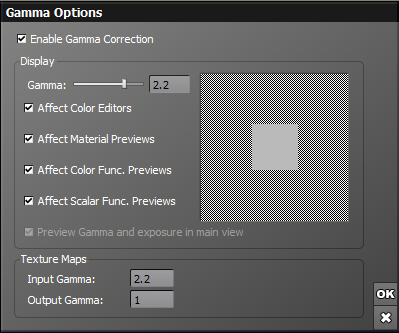
Next we click on the gamma button in the Post Render Options window (circled above in red). This will open the Gamma Settings window where we set the following options:
This means our EXR images stay in linear color space (1.0) but are displayed in Vue in sRGB color space (2.2). Because this mirrors what Nuke does, we will get a one to one correspondence between the two software.
|