| Fabric Shaders |
Fabric Rendering with the Thunderloom Shader
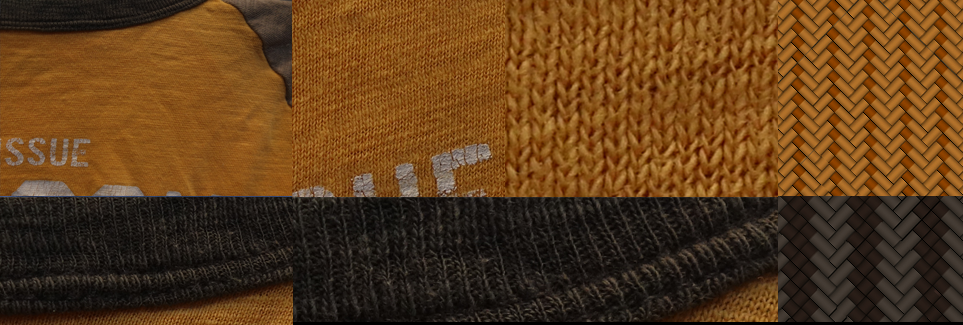
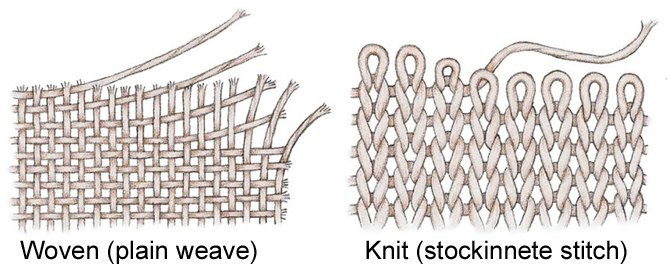 The two main ways fabrics are made are by weaving or knitting. Weaving is the process of interlacing two sets of parallel threads, known as the warp and weft, at right angles to each other to form a piece of cloth. Knitting involves pulling thread loops (called stitches) through other loops to form a piece of cloth. Typical examples of knit fabrics include t-shirts, sweat shirts, socks, many light summer dresses, and so on. Basically if a material is soft and comfortable it is likely a knit fabric. While the knit pattern of a sweater is easy to see, knit fabrics are very small, and so the knit pattern is hard to see. This is illustrated in the image below, showing a t-shirt at different magnifications.
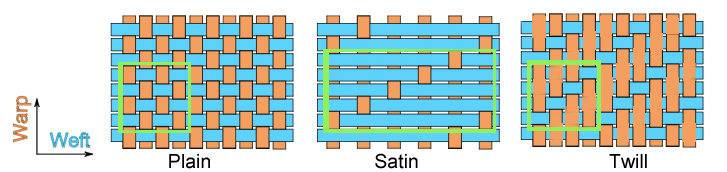
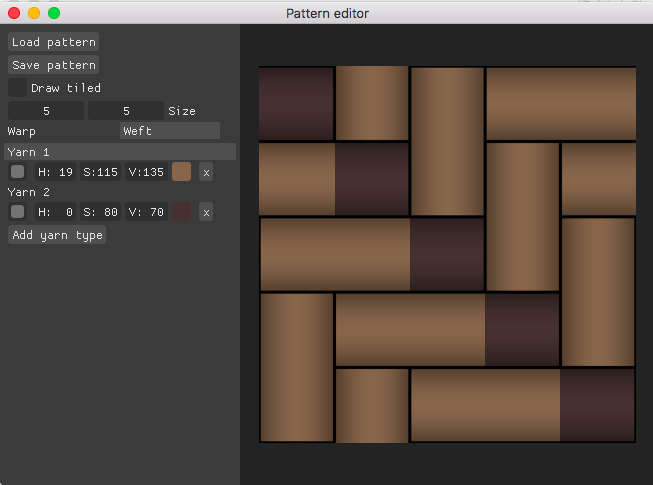
The bottom row of the above image shows the collar of the t-shirt which uses a rib knit pattern. On the far right of the above top and bottom rows you can see the WIF (Weave Information File) pattern we will use to generate these knit patterns in our CG shader. We can create this WIF pattern using a Pattern Editor program. This program is actually made for weave patterns which use horizontal (weft) and vertical (warp) stich patterns like twill or silk weave.
 In order to get our knit pattern we will need to later rotate the pattern 45 degrees. This is done using the "rotate UV" option in the Thunderloom shader.
 You can also download a collection of WIF patterns made by yours-truly, all in Thunderloom's native PTN format. The collection is divided into two categories, the first category consists of basic fabric weave and knit patterns, such as twill, satin, herringbone, basket weave and so on:
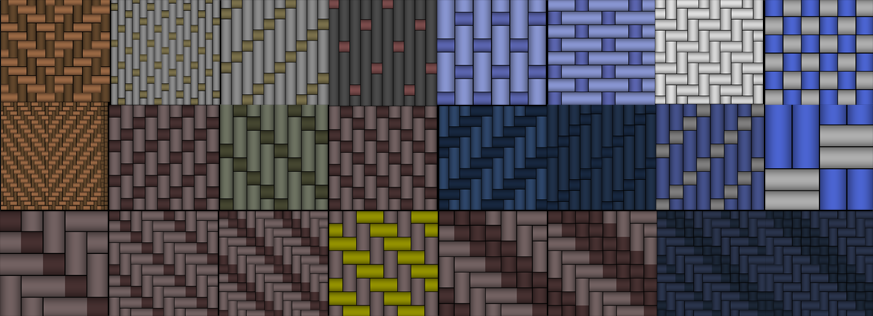 The second part of the collection contains an assortment of complex woven color patterns, including stripes and plaid tartans.
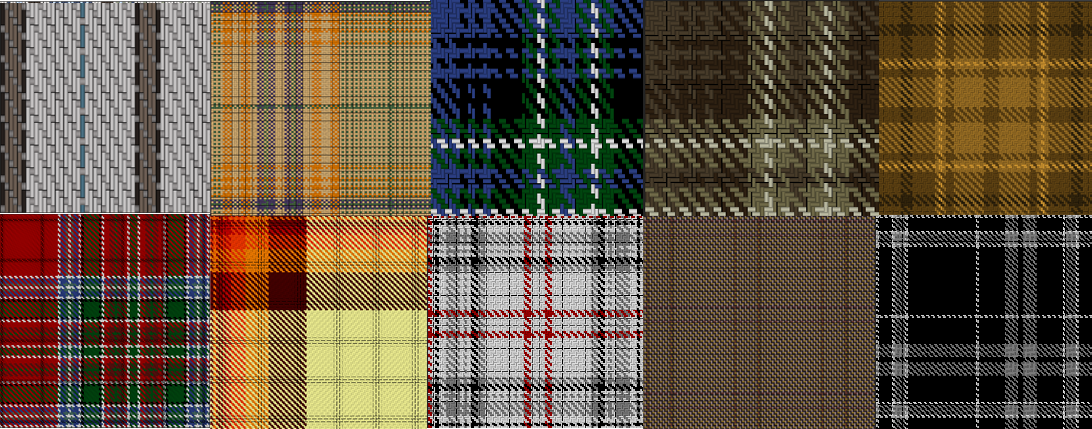 Once we have our pattern, the next step is to create a Thunderloom material in Maya and read our weave pattern into it. Thunderloom is a spatially varying BRDF (sBRDF) fabric shader plugin for Vray created by Vidar Nelson, Peter McEvoy, and Marco Fratarcangeli in collaboration with the CG department at IKEA Communications AB (ICOM), which is responsible for a large portion of the images in the IKEA catalog. The shader is based on the fabric shader proposed in the PhD thesis of Piti Irawan at Cornell. Below you can see the main parameters of the Thunderloom shader in the Maya attribute editor. The top section "default yarn type settings" gives you overall control, while the "yarn type" parameters below echo these parameters for each yarn (i.e. thread) type in the particular pattern file.
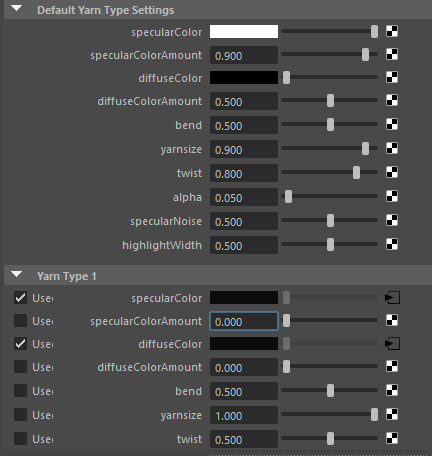 Unlike most BRDF shaders, these parameters do not control the shading of the object, but rather the shading of the individual thread segments in the woven or knit pattern. In making sense of these parameters it is helpful to understand that the fabric pattern is composed of segment rectangles, each of which represents a thread segment. A curved cylinder is used to model the thread segments. This is illustrated below.  A segment rectangle with its curved cylinder (image credit Piti Irawan)
Specular amount: a multiplier for the specular color. Note that if the spec color is white (100%) and the amount is 1.0 (100%) this will result in eliminating the diffuse. The math here is diffuse = diffuse_color*diffuse_amount * (1.0 - max(specular_color)*specular_amount). A good starting value therefore would be 0.9 (90%) for spec color, and 0.5 (50%) for diffuse amount. The general idea here is to have the secular color return the majority of the fabric color, while the diffuse color returns a slightly darker version of that same color (thus 90% spec, 50% diffuse as a rule of thumb). Diffuse color: In addition to inputting texture maps, it can look nice to input a VrayFalloffTexture, to get a brighter color at grazing angles, simulating the way that fibers on fabrics pick up translucent light at the edges of an object. Note that some materials (denim, nylon) are actually darker at grazing angles, rather than brighter. In the case of nylon this is because nylon stockings are sheer, showing the skin in the gaps between the threads, where as these threads become more dense at grazing angles, resulting in darkening. Both the darkening and brightening effect can be simulated with a FalloffTexture simply by adjusting the edge color. Diffuse amount: a multiplier for the diffuse color. Bend: the curvature of a single thread segment loop between its two ends (meaning how the thread comes up and goes back down for a single stitch loop). A value of 0.5 creates a perfect torus loop. Values above 0.5 increase this, while lower values make the segment curved at the ends and flat in the middle. This is useful for satin weave fabrics where the weft spans several warps, as illustrated in the image below. For other types of fabrics a value of 0.5 generally works well.
 Plain weave (left) creates an even curved bend as the weft thread weaves above and blow the warp threads. A satin pattern (right) result in a "flatter" bend that only goes down at the ends after spanning several warp threads. Yarn Size (gaps): controls the radius or width of the thread. A value of 1 means no gaps, lower values affect size of the gap between the threads. Usually a value of 0.8 works nice, giving a modest gap between thread segments. Twist (roughness): controls how much the constituent fibers of the thread are twisted around each other forming anisotropic highlights along the thread segments. Practically, the twist value functions as a "roughness" slider. Softer fabrics such as wool or cotton would thus have a higher twist value resulting in a rougher, softer appearance. Conversely, harder, smoother fabrics such as nylon or silk would have a lower twist value, resulting in a shinier and harder appearance. This is illustrated in the images below which show how differing twist values result in harder and softer appearing fabrics. Inset into each image the same specular highlights magnified.
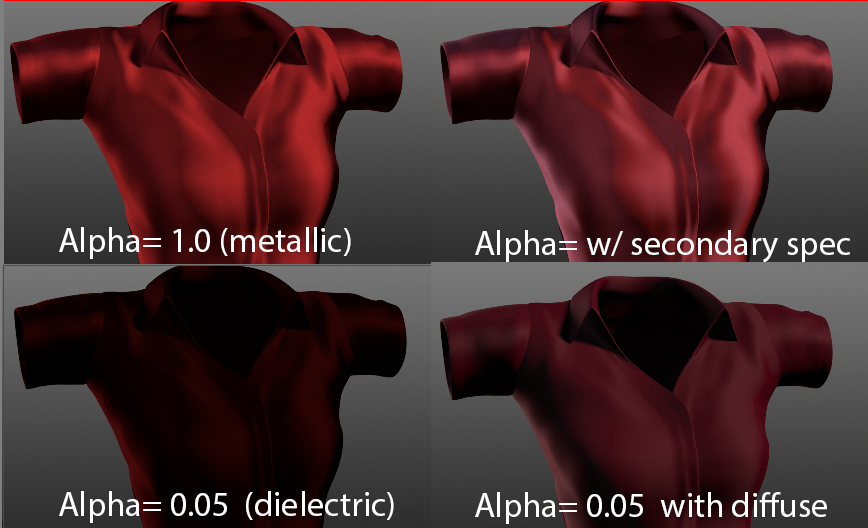
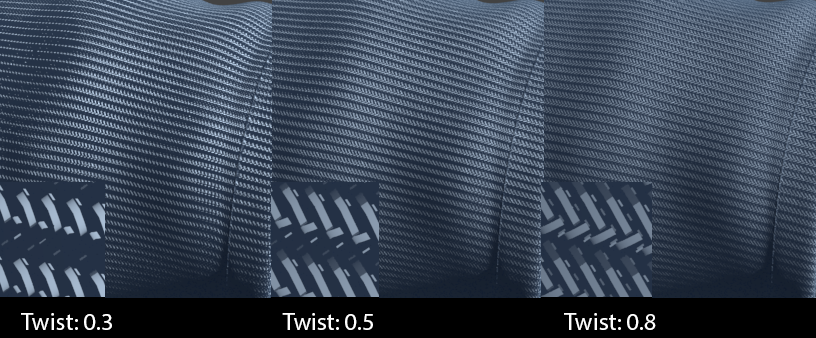 Left image: The low twist value (0.3) creates a fabric that looks hard, like a nylon backpack strap. Middle image: A medium twist value (0.5) creates a fabric that looks like a cotton dress shirt. Right image: A higher twist value (0.8) creates a fabric that looks soft like cotton sweat shirt. Alpha (uniform specularity): Controls the Fresnel effect of the specular highlights. The default value of 0.05 results in an essentially dielectric material where there is less specular from the front and more at grazing angles. In other words, setting the alpha to 0.05 will produce roughly the same result as setting the reflection IOR to 1.5 on a VrayMaterial. This is appropriate for fabrics such as cotton or wool. A value of 1.0 will cause the highlights to be uniform and thus look "metallic" which is characteristic of fabrics like silk.
 Left image: Twisted fibers along a thread results in anisotropic highlights. Right image: The cloth shader showing the same anisotropic highlight based on the twist value. Specular Noise: amount of noise to add to the specular highlights. Makes things look a bit more organic, and can also give a soft fuzzy look to the fabric. Highlight Width: how wide the specular reflection streak is within the thread segment. This affects the highlight along the width of the thread, while Bend affects it along the length of the thread segment. Thus setting this to a value of 0.5 will result in a nice falloff of the specular highlight as if there are shadows created in the gaps between thread segments.
Example 1: Basic Fabric Weave and Knit Patterns
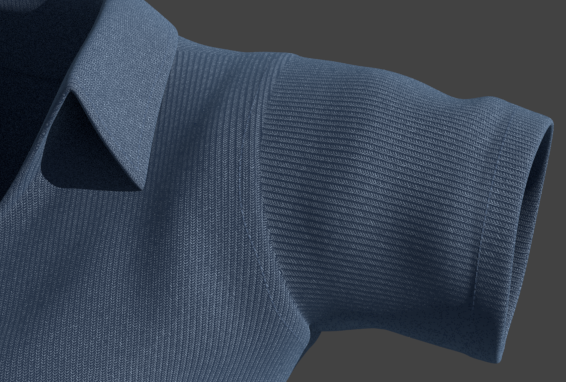
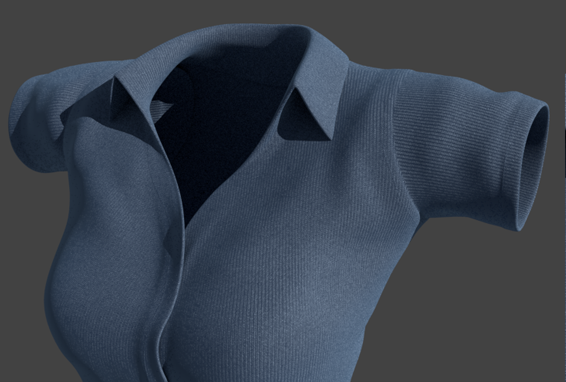 If we zoom into the render you can see the knit structure of the fabric (pictured below). The stitches along the seams are also visible. These seam stiches are made from a second Thunderloom shader which uses a WIF pattern consisting of horizontal lines to capture the highlights on the twisted fibers of each thread stitch along the seams. The shader has very high values for the yarn size, twist, and width, and very low values for the bend and noise, resulting in a broad highlight across the surface.
 In order to combine this with the main shader we need create a texture map to mask off the area of the stitches along the seams. In Photoshop the pen tool is used to create paths which are filled with dotted line strokes. This is saved as a black and white mask, and then applied as a mask for a final Vray Blend material, which puts the stitches over the fabric. In other words, the seam stitches shader is placed over the main fabric shader using a Blend material with a mask for the stitches.
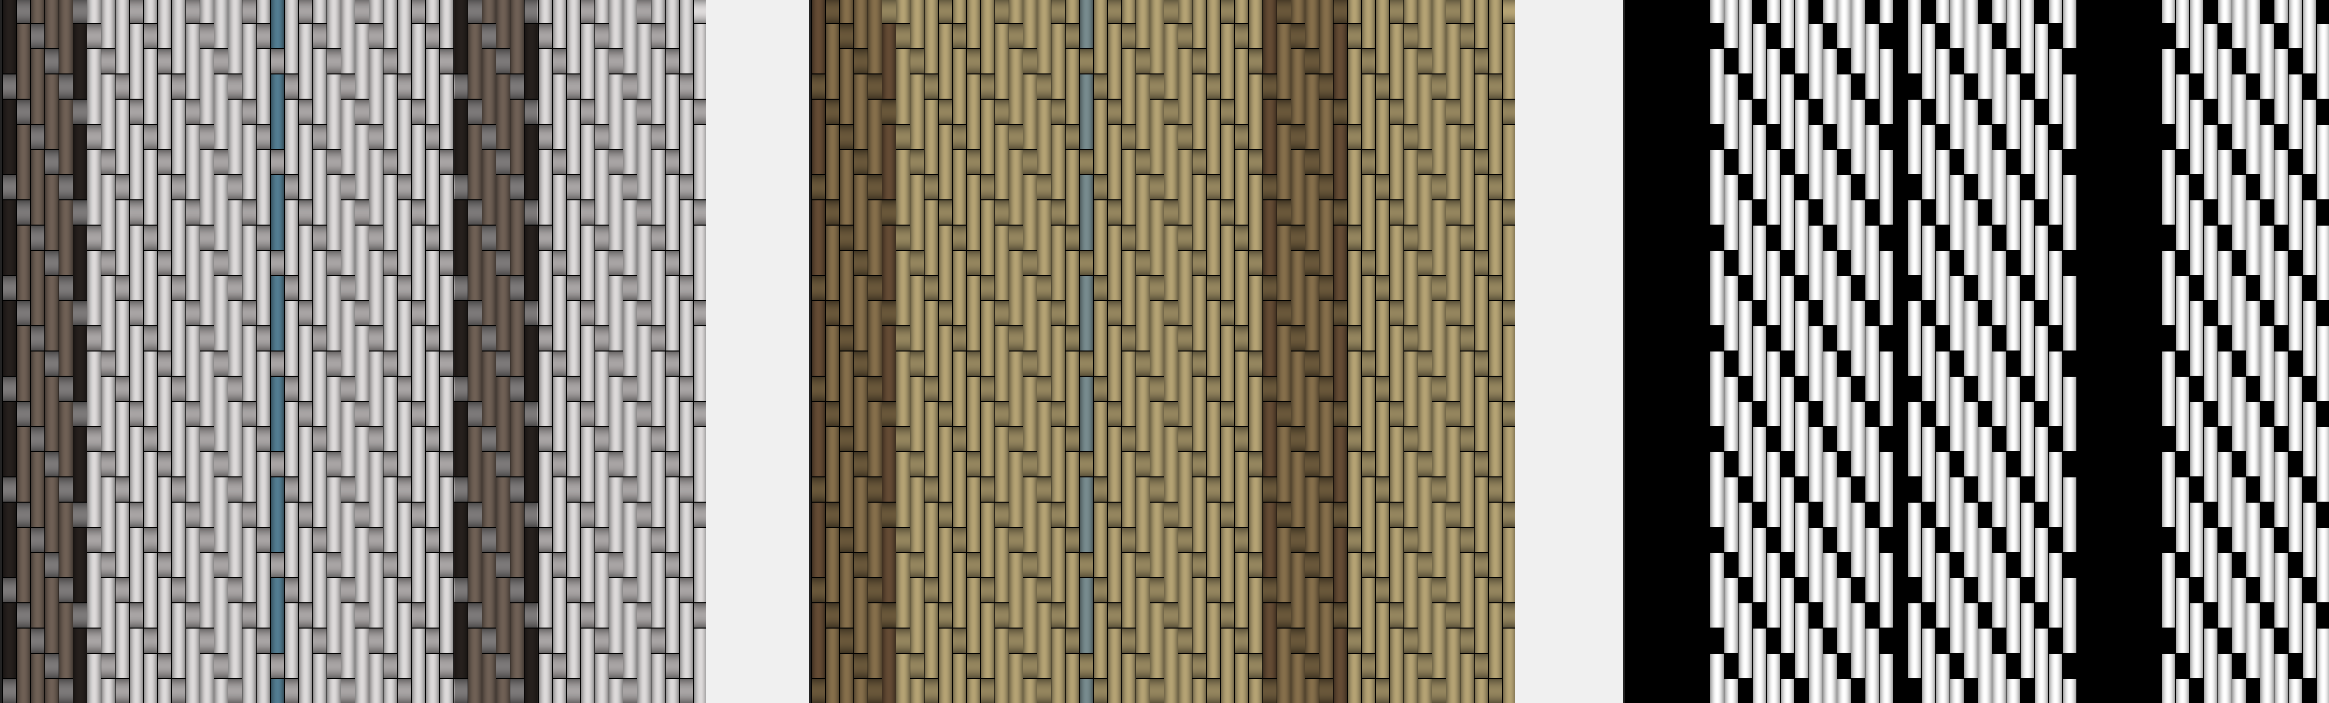
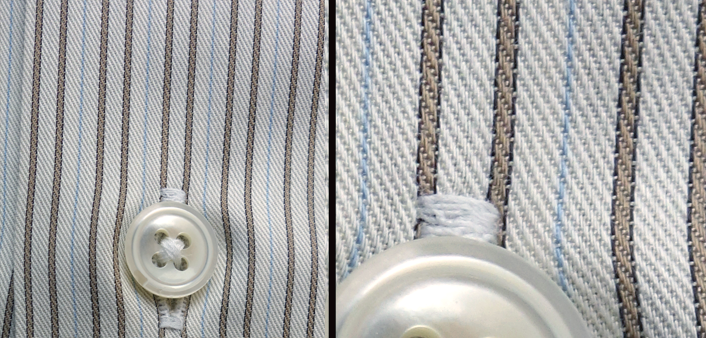 We can then recreate this pattern in the pattern generator (image below on the left). We begin with a simple twill pattern and introduce different colored warp threads to get the stripe pattern.
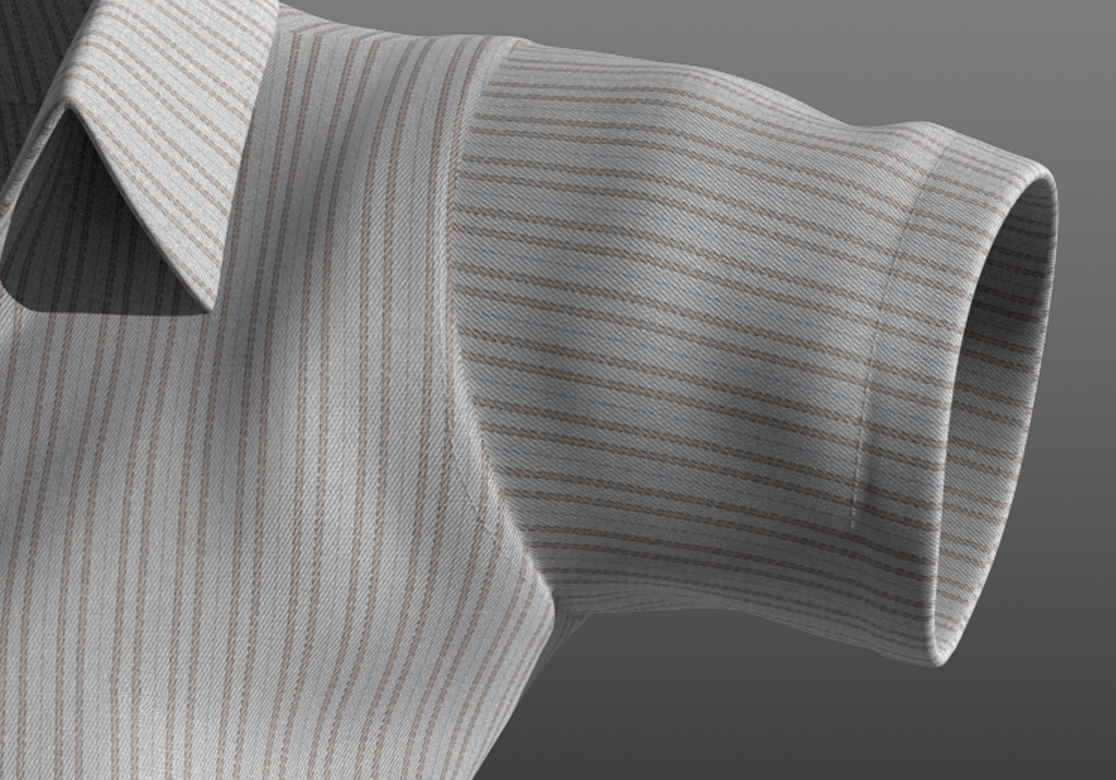
 Below you can see the resulting render. The shader is made in the same was as in the knit t-shirt example above, but the material properties on the Thunderloom shader are adjusted for the cotton twill weave dress shirt, which obviously has different material properties than a t-shirt (basically a t-shirt is softer).
 Example 3: Complex Color Patterns with Texture Maps
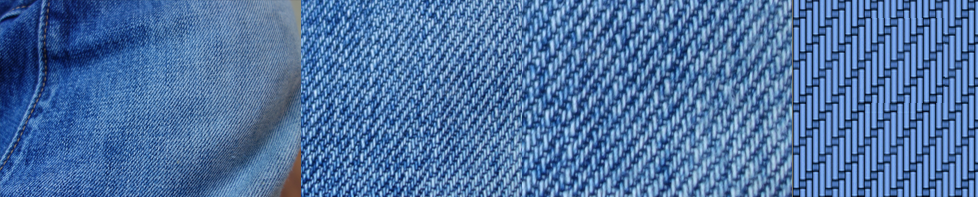 Woven twill denim blue jeans However, we can also see that there is a lot more detail in jeans than simply blue and white threads. For example we can observe how the fabric dye has lighter and darker hues through both wear (lighter on the knees and thighs) as well as stone washing (darker along the seams). We can capture this detail in a diffuse texture map inputing this into the diffuse and specular colors.
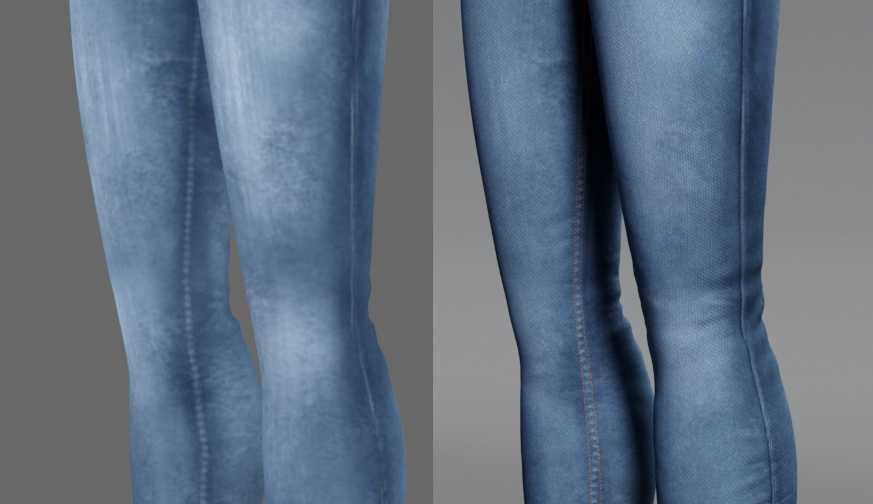 Diffuse texture map (left), and resulting render (right) Additionally, the orange stitches of Levi's blue jeans were made my layering an additional shader using an alpha of the stitches, as described above. Displacement maps were used to capture wrinkles and folds of the jeans, including the characteristic waving bumps along the inner leg seam, as currently the Thunderloom shader does not work with bump mapping.
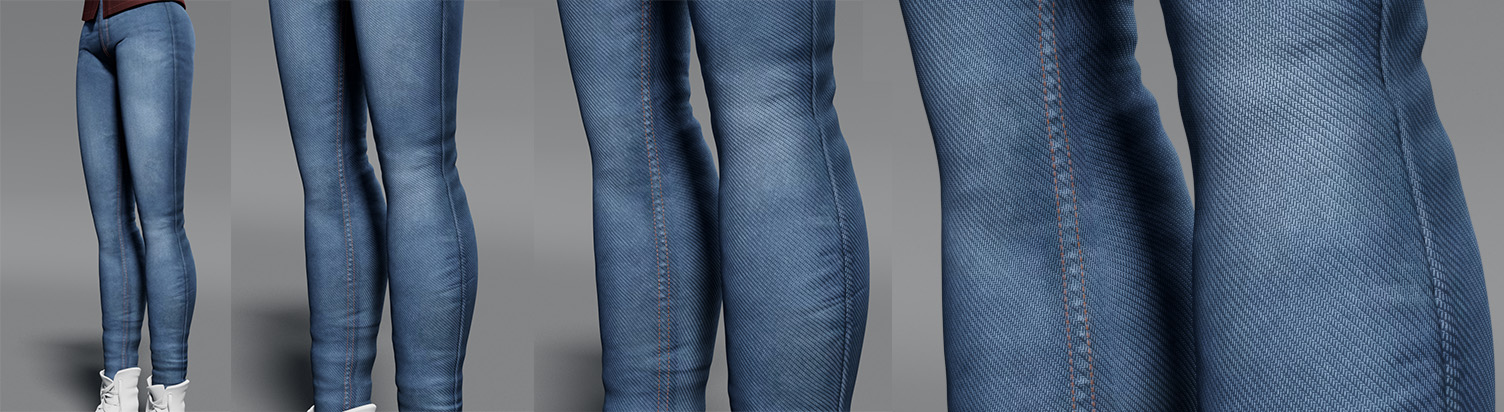 Jeans render at increasing magnifications
This technique of using texture maps for the spec and diffuse colors allows for a level of detail that really helps capture the complexity of fabrics. Observe for example this magnified photo of a blue knit hoodie. The color is simply blue, but if we look closer we can see that in fact there is variation in the color -- some thread strands are lighter blue, some are darker. This color variation can be input as a diffuse texture map, perhaps in this case made from a noise pattern.
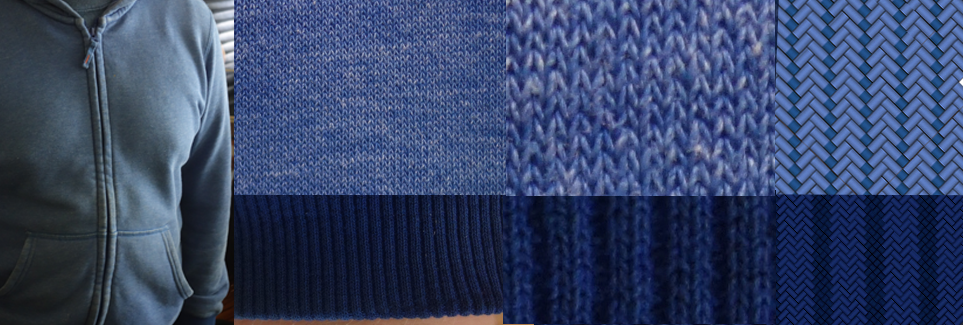 Knit cotton hoodie with 2-1 rib stich waistband
|