| Modeling turntables are super easy to set up. Just follow these steps:
Overview
In Maya:
- open the Maya setup file
- import your model in
- parent it under the curve
- save the file with the right name
- batch render
In Nuke:
- Open the Nuke setup file
- Follow the instructions in the file to load in your renders and write the MOV
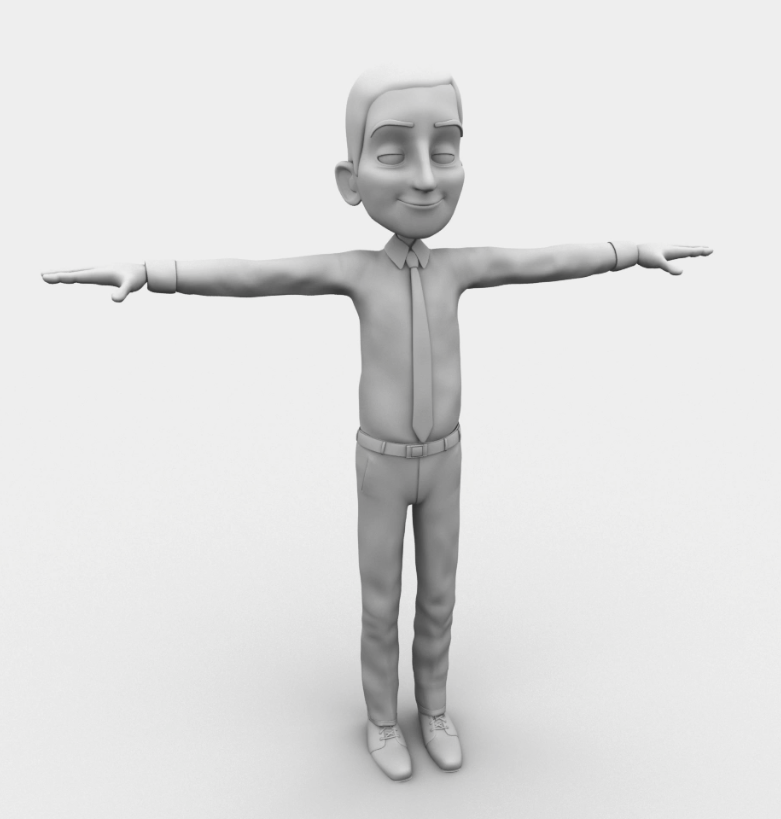
The result will be a MOV that shows the model with ambient occlusion (AO), wireframe, and a UV test pattern:
Ambient Occluson:
|
Wireframe:

|
UV Layout:

|
(Click an image above to see its enlarged view)
Each of these passes is used to check a different aspect of the model. The occlusion allows us to see the details of the model's overall quality. The wireframe allows us to check the topology. The UV pass allows us to check the UV mapping. Note in the above example that UV squares are evenly distributed across the model. Note too that the topology follows the form without undue detail. THis represents two often neglected parts of the modeling process: re-topologizing a model after the sculpt, and UV layout.
Detailed version
In Maya:
- First download the modeling turnable setup files and unzip it. This contains 3 files: A Maya file, Nuke file, and test texture pattern. Open the Maya file
- Next import your model in (file > import)
- Look through the render camera and make sure the model is framed properly. If not, parent the render camera under the main turntable group. Then, while looking through the render cam, scale the turntable group until the model fits.
- Parent the main group for your model under the curve called "asset_parent_curve"
- Save your file using the StudioX naming conventions (file > save as).
The naming syntax for a model file is:
[asset]_[type]_[version]_[artist].[extension]
Here's a legend:
Asset: the name of an asset (ex: Mara, Wagon, etc.)
Type: file type (ex: mod, geo, rig, etc. Modeling uses the "mod" type not "geo" which refers to a mesh derived from a rig)
Artist: the login name of the artist (ex: Dave Latour would be "dlatour")
Version: the version number with a leading zero (ex: "v02"). Always version up
Extension: the file type extension. Maya files are .ma a jpeg file is .jpg and so on.
So for example if David Latour modeled a book shelf it would be called
bookShelf_mod_v01_dlatour.ma
where "bookShelf" is the asset name (note that the double name book shelf is written as a single word with the first letter in the middle capitalized), "mod" is the asset type, short for model (note this is not the same as "geo" which refers to a mesh derived from a rig), dlatour is the artist's login name, it's the 1st version, and "ma" is the file extension.
The model is a prop (as opposed to a character or environment element) and so it goes here:
assets/
prop/
AssetName/
design/
If that's not enough for you there's more on naming conventions here
- You're ready to go. Just batch render! (render > batch render). It will write out 3 render layers: AO, Wireframe, UV
In Nuke:
Load the render sequences
- Open the Nuke setup file (ModelingAO_setup_v3.nk)
- Load the render layer sequences (UV, occlusion, wireframe) into the corresponding read nodes in the Nuke. These are annotated in the Nuke node graph.
Write the movie:
- Double click the write node at the bottom of the node graph, and fillout the path and name of the movie file you want to write (note the name must end with the extension in .mov). Make sure the codec is set to either H.264 or MPG4 with a data rate of at least 3000 kb/sec (click the "advanced" button to access this).
- Click the "render" button in the write node, and in the render window that opens, make sure the full frame range 1-450 (the global settings) are set before clicking "OK".
- Watch your turntable movie to make sure everything went as planned

Submit for review
Once your comped turntable movie is done you'll need to submit it to Shotgun for review.
- Login to Shotgun, go to your project, and navigate to the assets page.
- Click your model asset to open its page. With the versions tab selected, click the "+ version" button. This will open the following window:
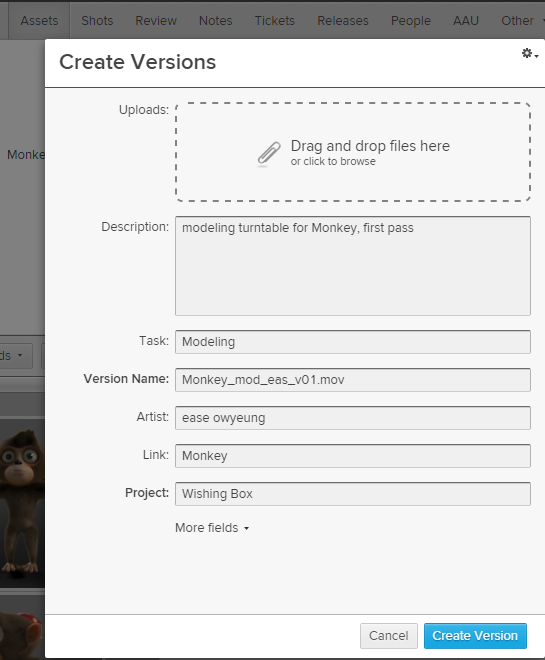
- Make sure you have the following fields filled out before submitting:
Description: This is where you list the notes from Shotgun review that have been addressed in this version. Details on how we do this in the CG Lighting StudioX class can be found here
Task: Begin typing to auto-complete to the name of the pipeline task on SG (in this case “modeling”) .
Version: This should auto populate with the name of your uploaded turntable movie file (which is why you should make sure it has properly follows the naming conventions as described above).
Artist: Begin typing to auto-complete your shotgun user name.
Link: Begin typing to auto-complete the name of the Asset on SG for your model.
Project: This should already be populated with the SG project name.
If one of the above fields is missing you can add it by clicking the "more fields" link in the above window.
|