| Fabric Shaders in Arnold |
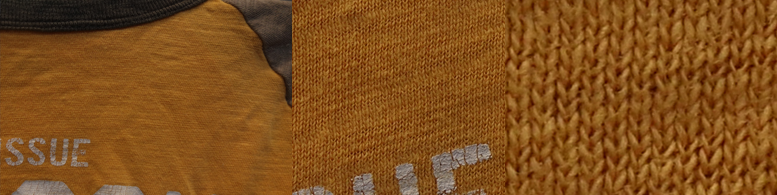
Fabric Rendering with ArnoldUntil there is a dedicated shader for fabric, the following workflow attempts to simulate fabric appearance with a BRDF shader, and the use of texture maps for threads derived from geometry. In other words, the secret to getting realistic fabric is to actually model the fabric threads, and then use this geometry to generate a highly detailed texture map. We'll begin with knit fabric, which is the way most soft and comfortable fabrics are made, such as t-shirts, sweat shirts, socks, many light summer dresses, and so on. Below you can see photographs of knit t-shirt at differeing magnifications.
 To model the knit weave we begin with a basic knit loop, and then replicate that in X & Y until we have a square area covered in knit geo loops.
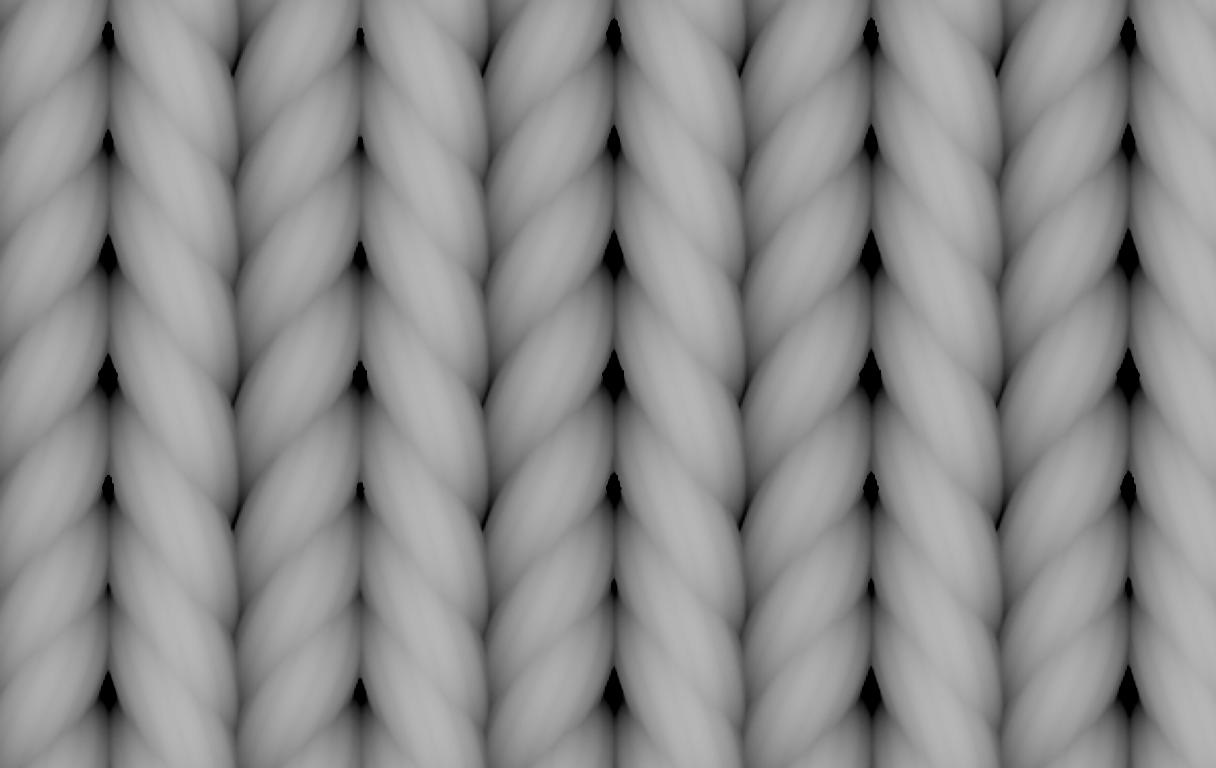
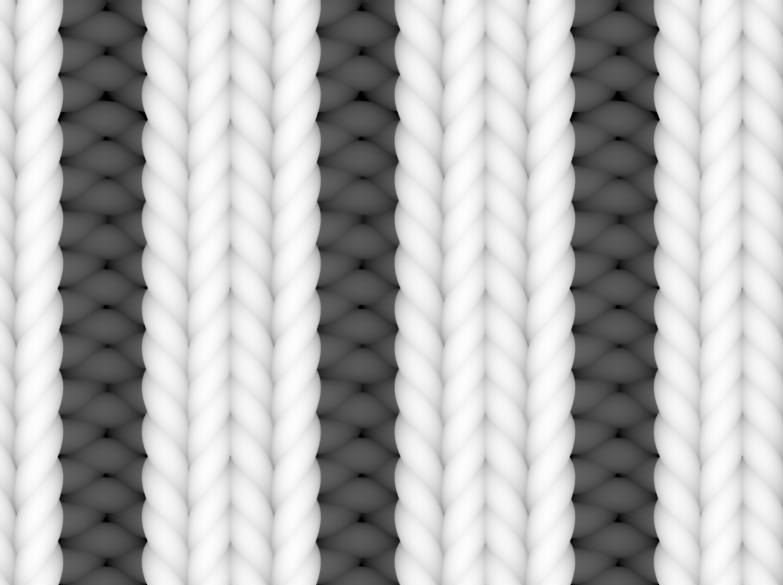
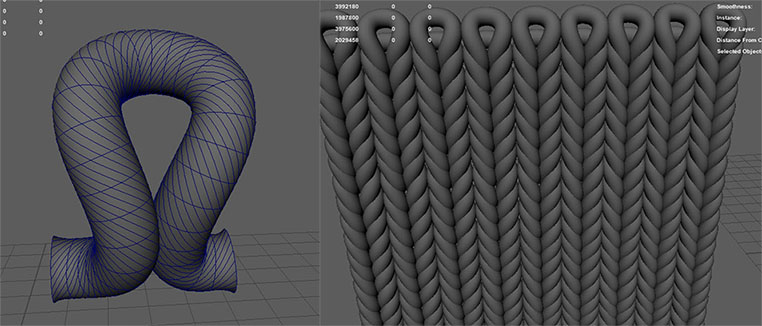 Next we render a z depth pass with an orthographic camera. Because we will be tiling this map, it's critical that there are no seams. This takes some love in Nuke using crop and offset tools. Nuke has a tile node that can be use to check things, and there's a good offset gizmo that can be found on Nukipedia. Because Z depth works with real scene values (that is, the pixel values correspond to the distance from the camera in scene units), the image will need to be normalized. This is done by adjusting the black and white points with a Grade node in Nuke. Using a Z depth pass allows us to get accurate hight information from the geometry for our threads.
 You can flip the knit loop in alternating rows to get ribbed knit pattern.
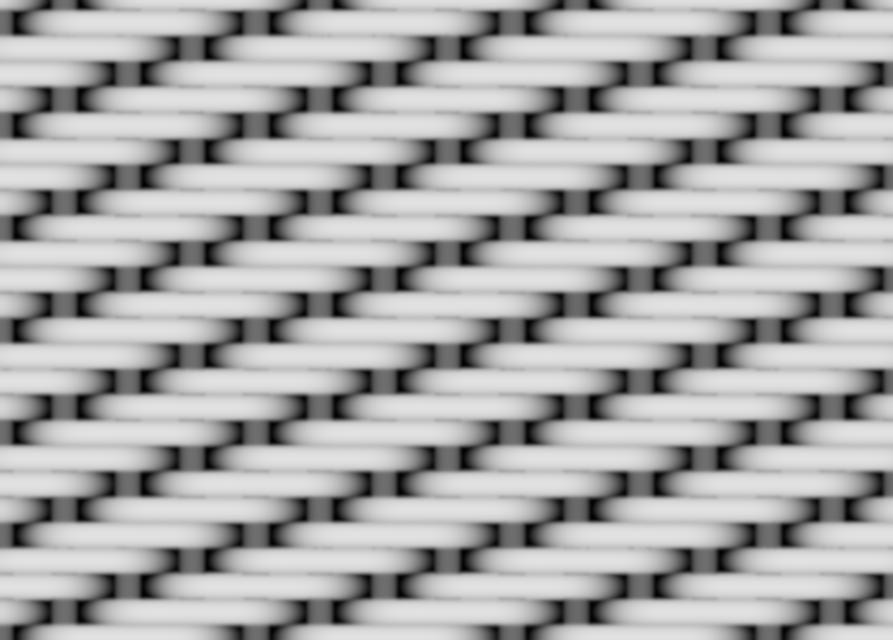
 Compared to knit fabrics, making woven fabric is much easier. It's just tubes that (literally) weave in and out of straight tubes. For example, here's a twill weave, which is probably the most common weave, found in things like blue jeans, many dress shirts, jackets, and so on.
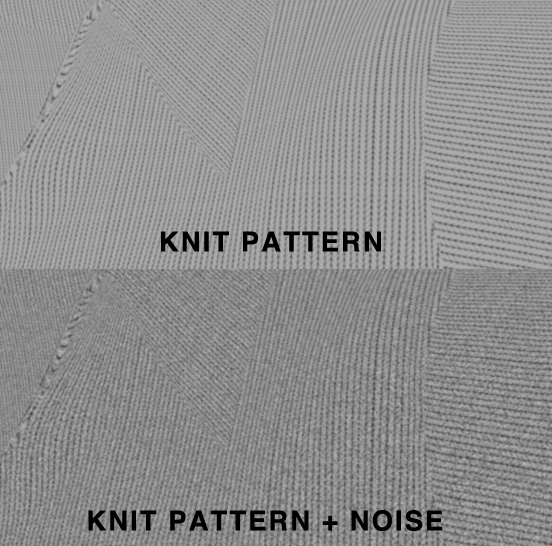
 The last map we will need is a monochrome Gaussian noise pattern, which can easily be made in Photoshop with filter>noise. We will use this to introduce variation into the fabric pattern to make it look less synthetic. You can download all of the above maps as a zip archive to get you started in making fabric materials. With all of our maps ready, we next need to build the shader network, illustrated below: 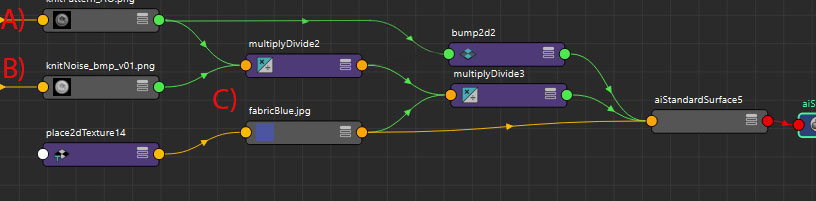 We begin with the texture maps, consisting of (A) our knit fabric pattern map, (B) the noise pattern, and (C) the color texture map. We will be tiling both the fabric pattern (A) and noise maps (B) to their desired size. In this example, the knit is tiled 60 times, and the noise is tiled 2 times. The color maps are not tiled and just work with the object's UVs. First we simply connect the fabric pattern map (A) into the bump, which is set very low (0.01 in this example). The bump has very little effect on the shader and should be barely visible. The really important part of the shader is the spec color which we mix together with two mults: The first mult mixes the fabric pattern with the noise to give it organic variation (pictured below), and the second mult tints the threads with our diffuse color. Let's go over those two mults in a bit more detail. As shown in the shader network above, first the fabric pattern (A) and noise (B) are multiplied together. You can modulate the effect of this by adjusting the offset in the Color Balance section of the file node.
 Second, we take this multiply/divide and mult it with the diffuse color texture map (C), thus tinting it. This result (called multiplyDivide3 in the shader network pictured above) is then input into the specular color on an aiStandardSurface. The color texture map (C) is also input into the diffuse and sheen color on our aiStandardSurface shader. On the shader itself, we want to set the parameters for fabrics. So we have a very low diffuse weight (0.25) and diffuse roughness set to 1.0 to get Oren-Nayer diffuse giving us a soft chalky look to the diffuse, rather than Lambertian diffuse. On the specular we have a very high roughness (around 7.0 to 8.0 depending on how soft the material is). This high roughness simulates the soft look of most knit fabrics. For shinier materials like nylon or silk the roughness can be lowered. Anisotropy is set to 0.5 to capture the anisotropic nature of the fabric threads directionality across the surface. We have a bit of sheen to capture the way stray threads or fuzz catches light at glancing angles on fabric. This is pretty subtle on most fabrics, so should be kept minimal. The specular IOR is set to 20.
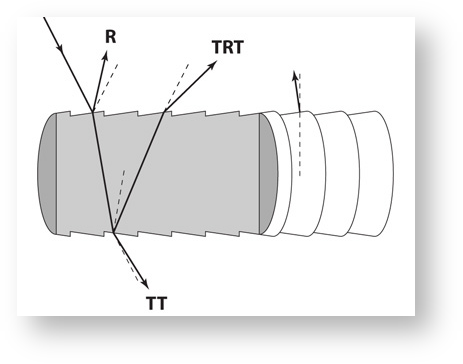
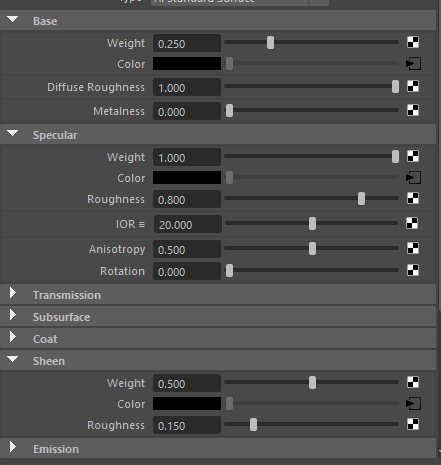 Let's discuss a bit of theory here. Fabrics are dielectric and so would have dielectric Fresnel (a value of about 1.5 IOR). However, that is on the individual threads, not across the entire surface of the clothing. To get that we would need to have a shader like Thunderloom which shades the individual fabric threads, rather than a BRDF that shades the object's surface. Since we are using the aiStandard Surface shader we therefore need to effectively disable Fresnel across surface, which we do by setting the IOR to 20. Secondly, we are putting color into the specular, which on a dielectric would normally be colorless. This is to simulate secondary specular or TRT (Transmission Reflection Transmission) as it is called in the Marschner hair model, where the TRT highlight is formed by light that passes through the interior of the fibers, picking up its color. In contrast to hair, on most fabrics, the TRT highlight is predominant, with the colorless R (Reflection) highlight being barely visible.
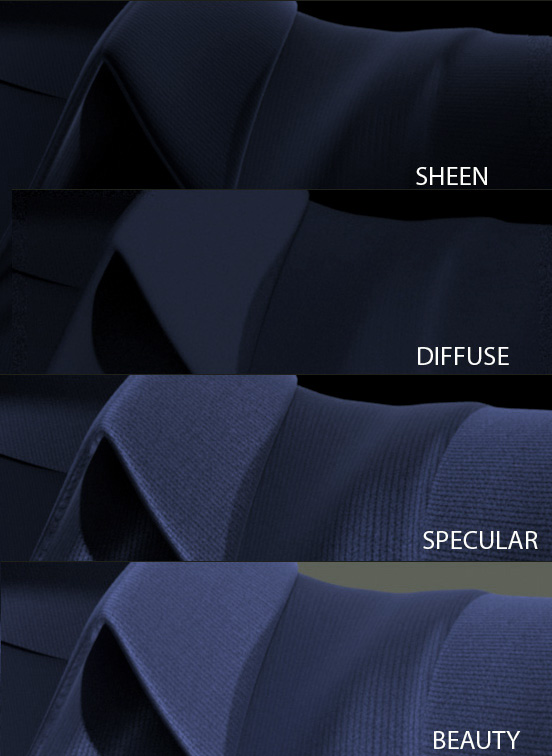
 Below you can see the passes for the sheen, direct diffuse, and direct specular, the specular being the most significant of these.
 Here's a look at the shader at increasing magnifications. 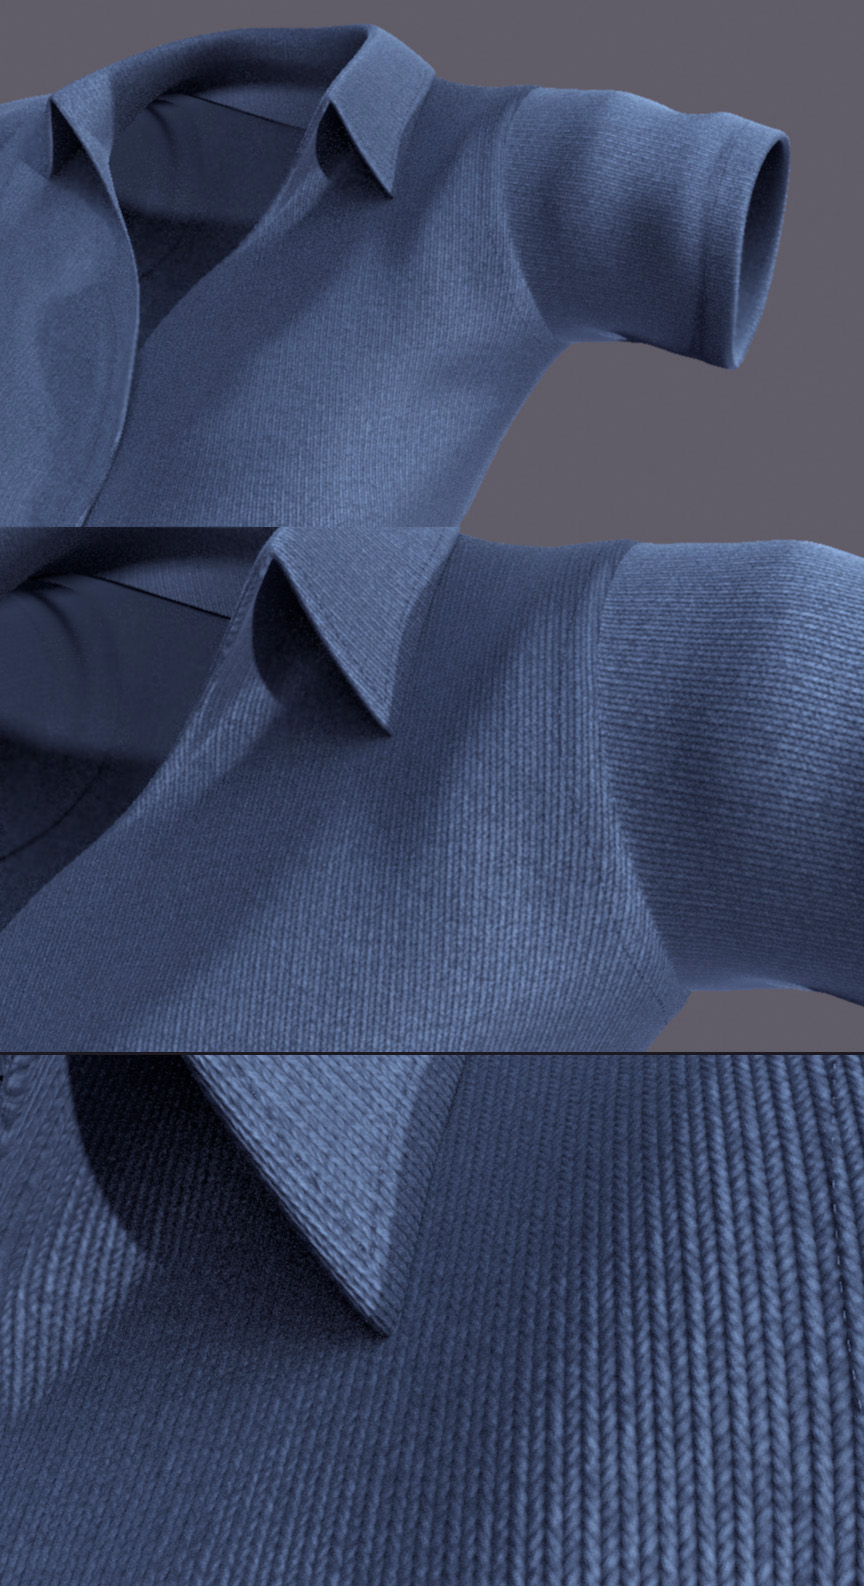 Additional details, such as stitching, can be added with a layer shader, creating the mask for the stitches with paths in Photoshop.
|